How to Paint a Bold Acrylic Floral Painting
In this acrylic painting tutorial, I’ll walk you through the process of painting a bold flower on canvas. Whether you’re a beginner or a seasoned artist, you’ll have fun following along and painting this fun, vibrant flower step-by-step.
So grab your favorite drink, light a candle, pump your favorite tunes, and let’s dive in!
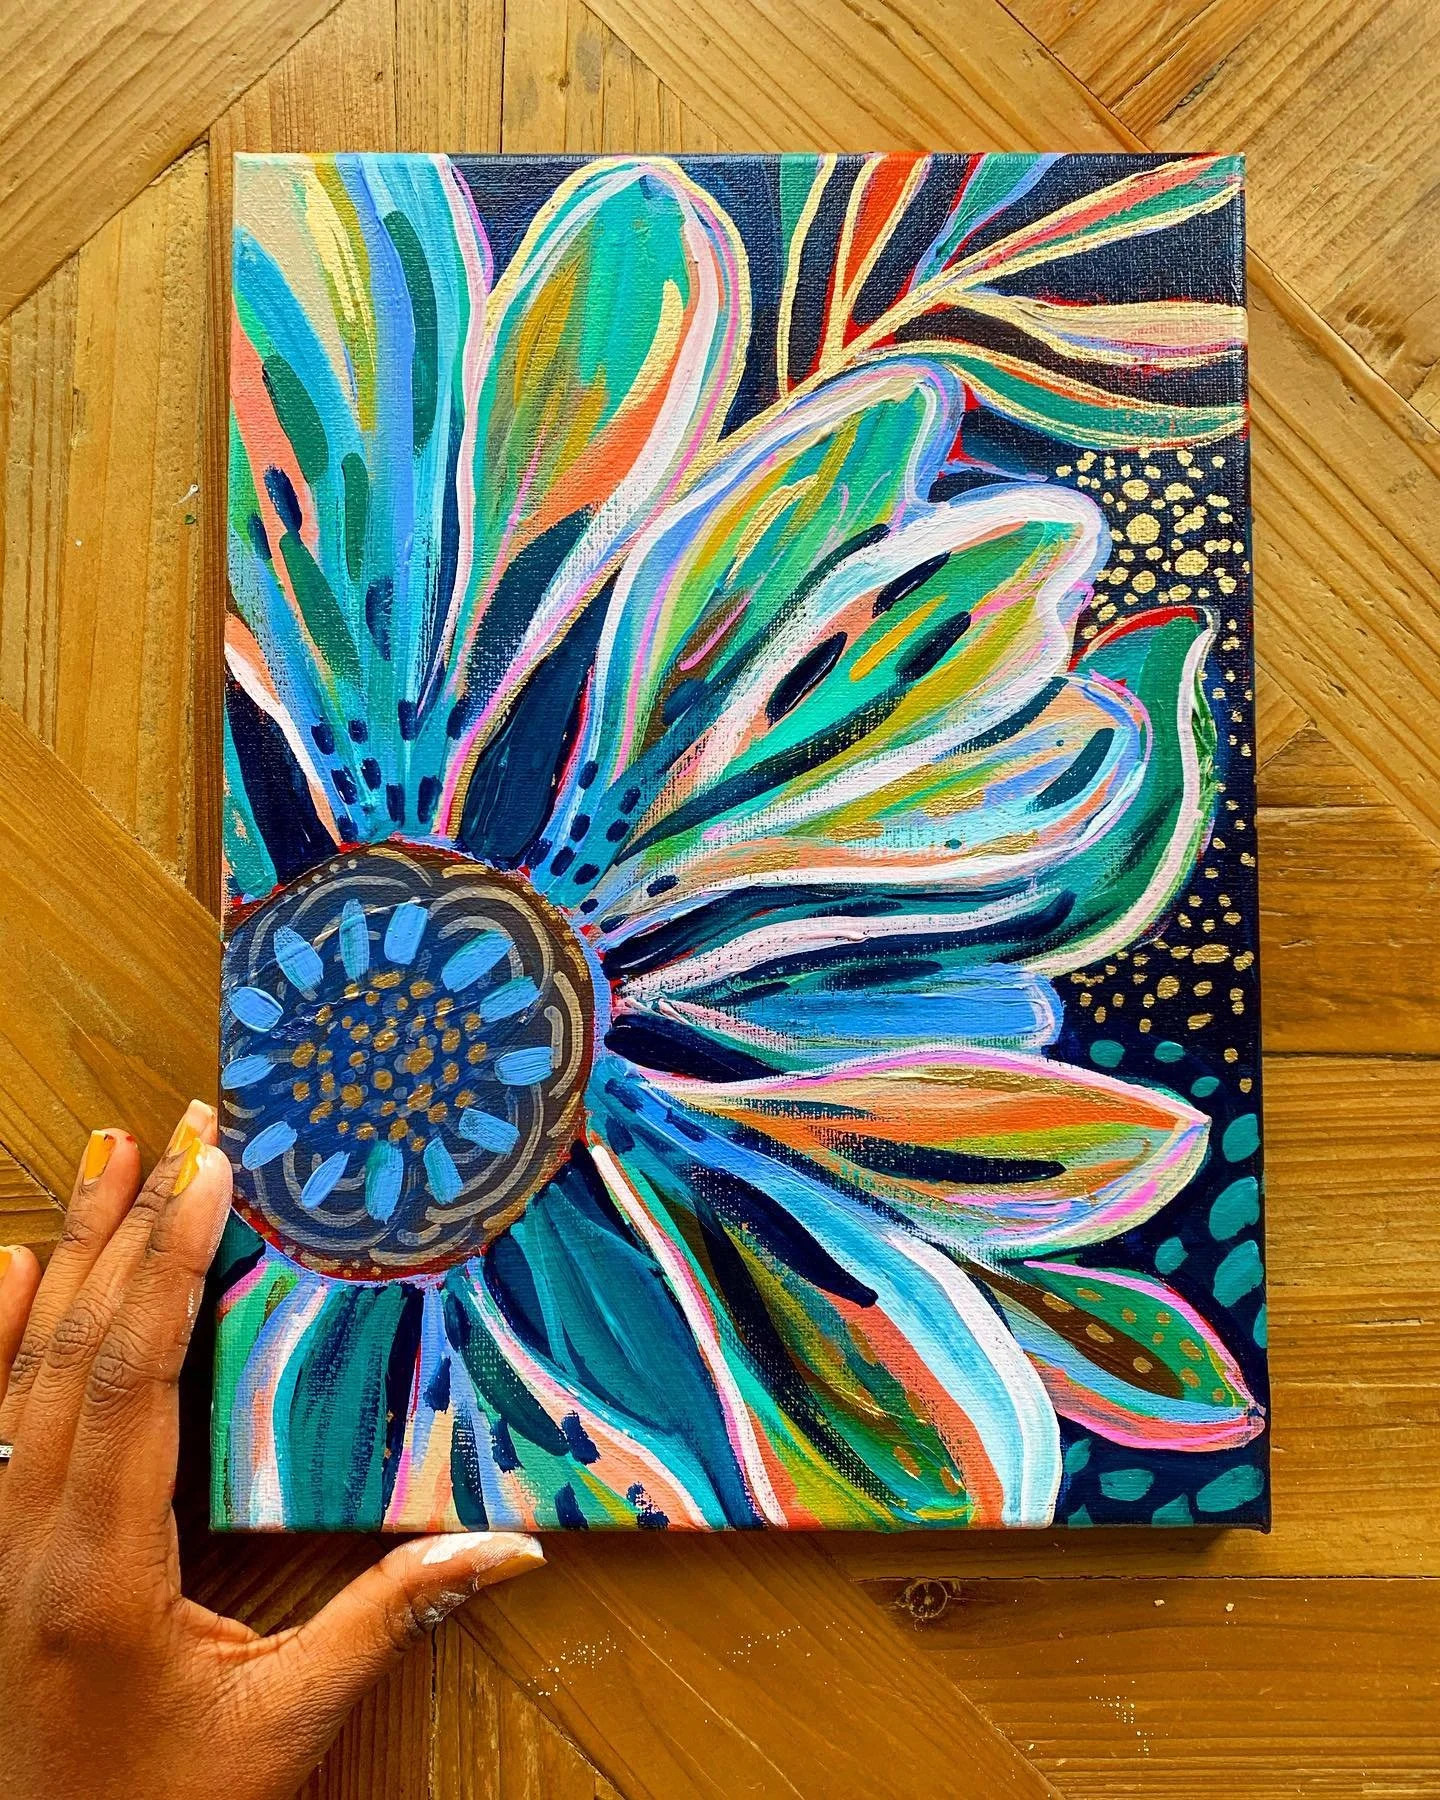
By the end of the tutorial, your painting will look something like this!

Note: This tutorial is for your personal enjoyment. This image is copyrighted and cannot be recreated or sold for profit.
Supplies:
Note: Some of the links in this post are affiliate links. This means if you purchase something after clicking one of my links I may receive a small commission at no additional cost to you!
Acrylic paint
My favorite paint brand is Liquitex, but you can use anything you have on hand for this tutorial.
Here are the colors I’ll be using
Titanium White
Primary Yellow
Fluorescent Pink
Turquoise Blue
Prussian Blue
Canvas to paint on
I’ll be using a small canvas in this tutorial but you can use any surface you like!
Paint brushes
You don’t need to get anything fancy here! I prefer the Simply Simmons brushes like this one. You’ll just want to make sure that you have a Filbert brush since we’ll be using that to get good coverage on our flower petals.
Gold Art Supplies
We’ll be adding gold flourishes to this piece at the end. You can use gilding wax and paint pens for a variety of fun gold details. I like using DecoColor paint pens and Pebeo gilding wax.
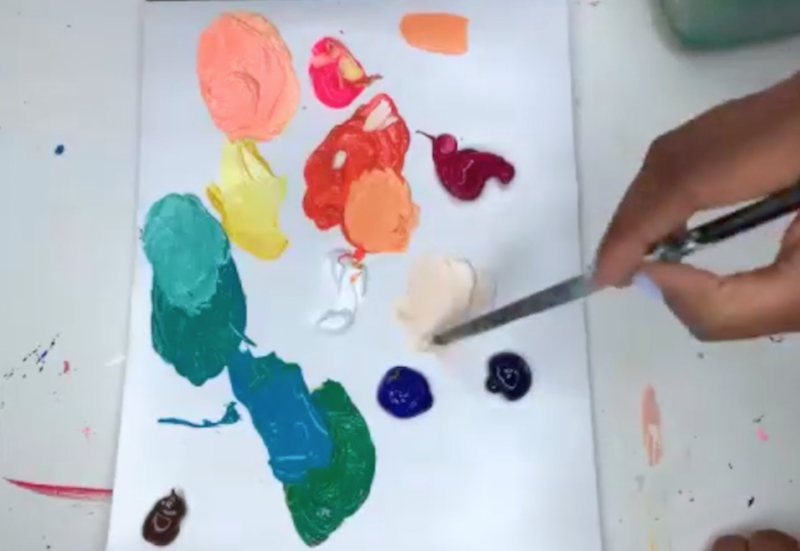
Step 1: Choose a color story + Mix Colors
I’ll be using blue and turquoise as the main color family for my bold flower, but I encourage you to make this piece your own. Think about what kind of color story you want to adhere to, and pick a few main colors to use for your piece.
Once you’ve decided on your main colors, you can start the process of mixing your acrylic paint colors. I have an entire tutorial on how to mix vibrant colors with acrylic paint here. Check it out if you need some color mixing inspiration!
Even though my main colors are turquoise and blue, I mixed a rainbow of colors to add details and depth to my piece.
Step 2: Underpainting
This step is optional, but if you’d like, you can add a contrasting underpainting to add some extra depth to your piece. I used a magenta underpainting and loved how much interest it brought to the finished piece when I let bits of it pop through.

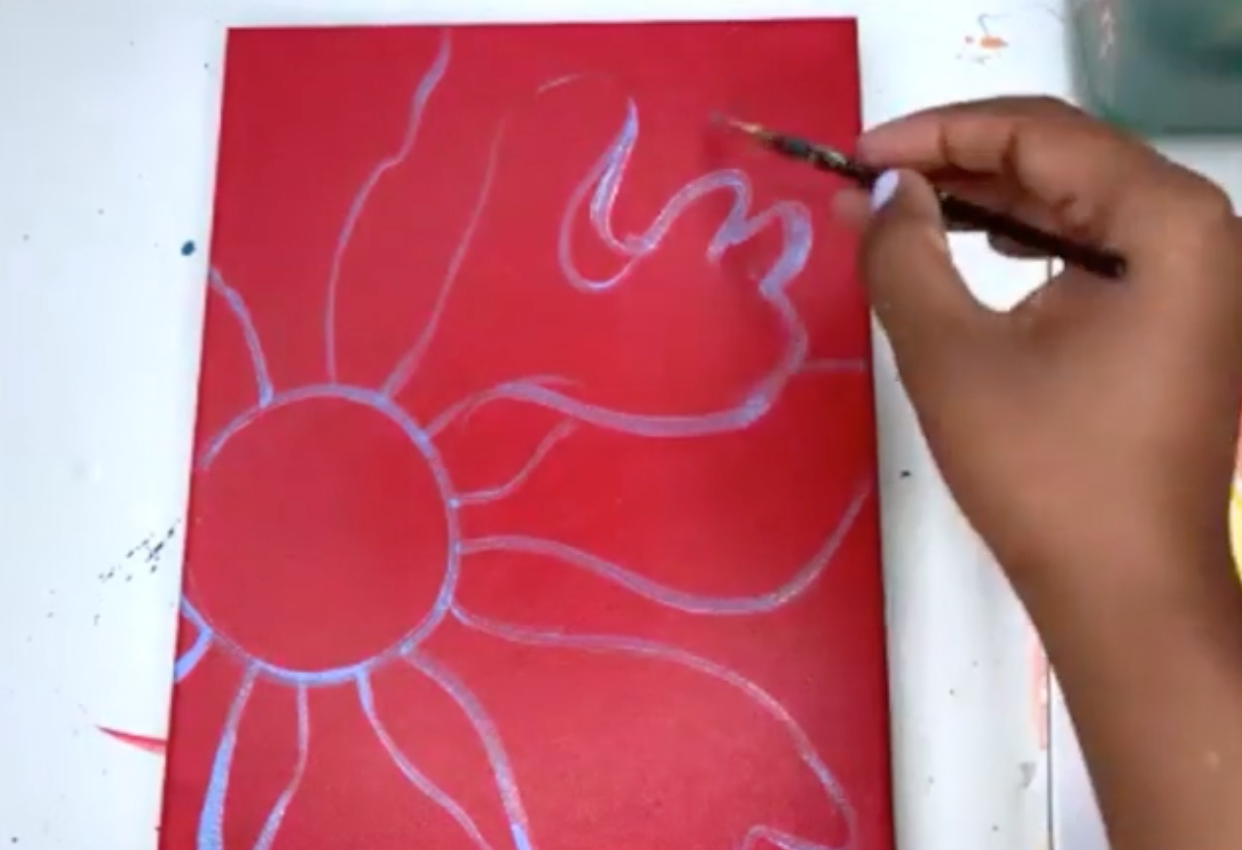
Step 3: Sketch your flower
Now it’s time to sketch your flower! I’m going to situate mine on the left side of the canvas for a more graphic, pop-art feel. If you’re using a square canvas, you might want to center it. The choice is yours to make!
Start with the center of your flower and paint large organic petals coming off of the center.
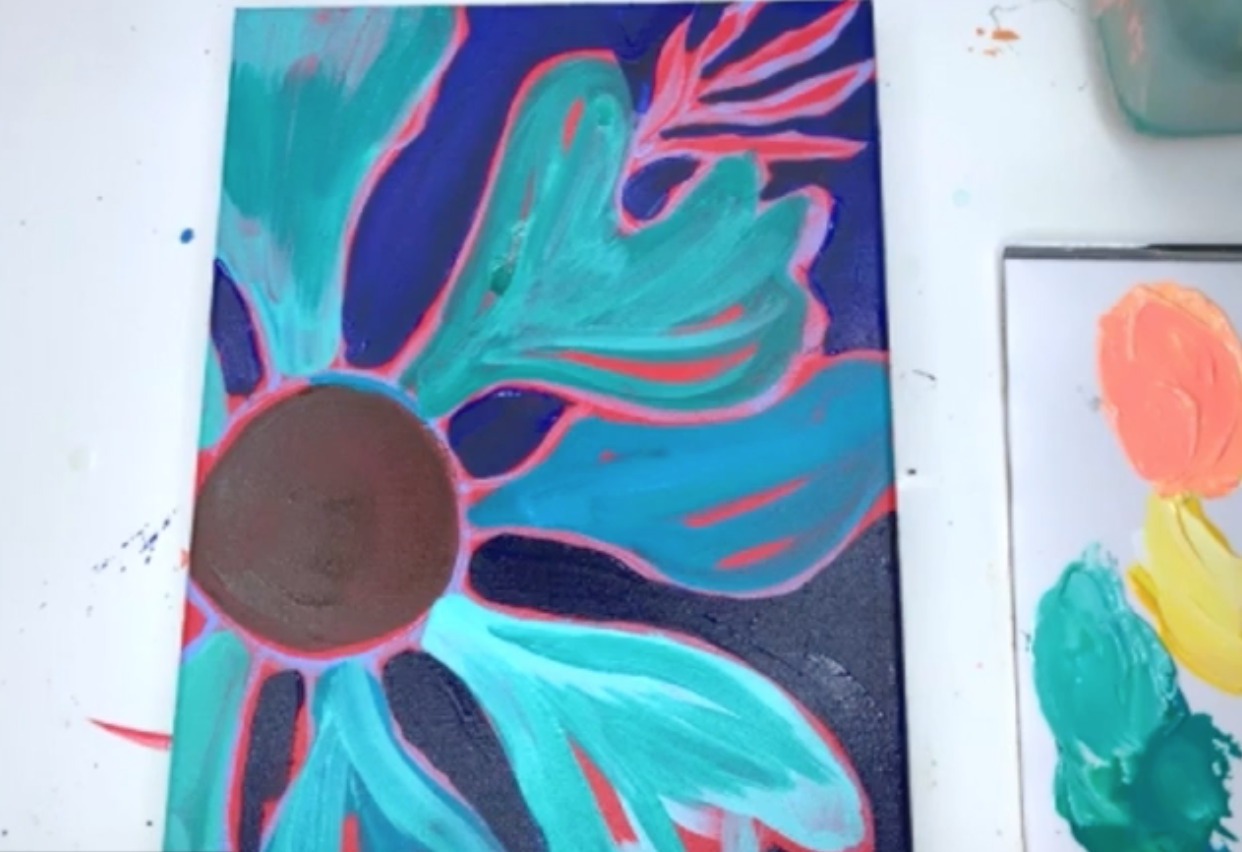
Step 4: Paint the petals and center
Next, it’s time to fill in the sketch and paint the main parts of your flower. I’m going to use various shades of turquoise for my petals and dark brown for the center.
No matter what color you’ve chosen, just make sure all your petals are within the same color family. That way the piece will remain cohesive even as we add details and brushstrokes later on.

Step 5: Paint the background
Now, it’s time to paint the background! I recommend using a darker color than the one you’ve used on the petals so that the flower will really pop!
In my example, I’m going to use a cobalt blue for the background. Pro tip: Leave little bits of your underpainting peeking through to add some extra interest and dimension.
Step 6: Add large flourishes to the petals
Add a modern touch to your bold flower by including brushstrokes in unexpected colors along the petals. Follow the shape of the petal with a bold contrasting color. In my example, I added a hit of hot coral paint to each petal to break up the monotony of the turquoise and blue. This helps define the petals and adds a unique spin to the piece.

Step 7: Add a lighter color to the edges for texture
Give your flower a natural feel by adding feathery brushstrokes to the end of each petal. I did this in a beige color, but any light color will work.

Step 8: Keep layering defining brushstrokes on the petals
Next, add more defining brushstrokes to your piece in harmonious colors. In my case, I chose a light teal that was more toward the green side of things. I also chose a striking lilac to make my piece feel extra special.
Keep adding brushstrokes until you’re happy with how the petals look. We’re going to start adding details in the next steps. This is where the piece will really start to come together!

Step 9: Define the outer petals
You can further define the petals by outlining them with a light color if you’d like. Notice how mine really pop with the hit of white at the edges.

Step 10: Add details to the center
The center of the flower is very dark, so it can use a little extra pizzazz. I used a gold paint pen and brushstrokes of gilding wax to make the center of the flower pop.

Step 11: Add details to the petals
Now for the final step! Adding details to the petals. I wanted to finish out my piece with some dark Prussian Blue details on my petals. Make sure to always keep following the shape of the petal so that these details look organic and intentional. Experiment with shorter brushstrokes toward the middle and longer ones toward the edge of the petal.

And the pièce de résistance, gold details! Finalize your piece with gold accents on the petals, the background – anywhere you want! Gold flourishes really bring it all together to make a cohesive, bold piece.

Et Voilà! Your bold masterpiece is complete!
I would LOVE to see what you made! Share your painting on Instagram and tag me @ettavee so I can see what you made!
Want more abstract painting instruction? Join me in my abstract painting class, Joyful Abstracts, for an in-depth art class where I walk through my entire abstract painting process from start to finish. You’ll learn how to gather inspiration, how to sketch out your composition, what colors to choose, how to paint a balanced abstract, and how to varnish your painting so it will last a lifetime!
xo, Jessi

Pin this post for later! 📌
Hover or tap on this image and click the “Save” button on the top left!
