Acrylic Sun Painting Tutorial
In this acrylic painting tutorial, I’ll be teaching you how to paint an acrylic sun using abstract painting techniques. This bright and vibrant sun painting will bring a pop of color and positive energy to your space.
Gather your favorite materials, get comfy, and put on your favorite sunny playlist for this fun acrylic painting tutorial!
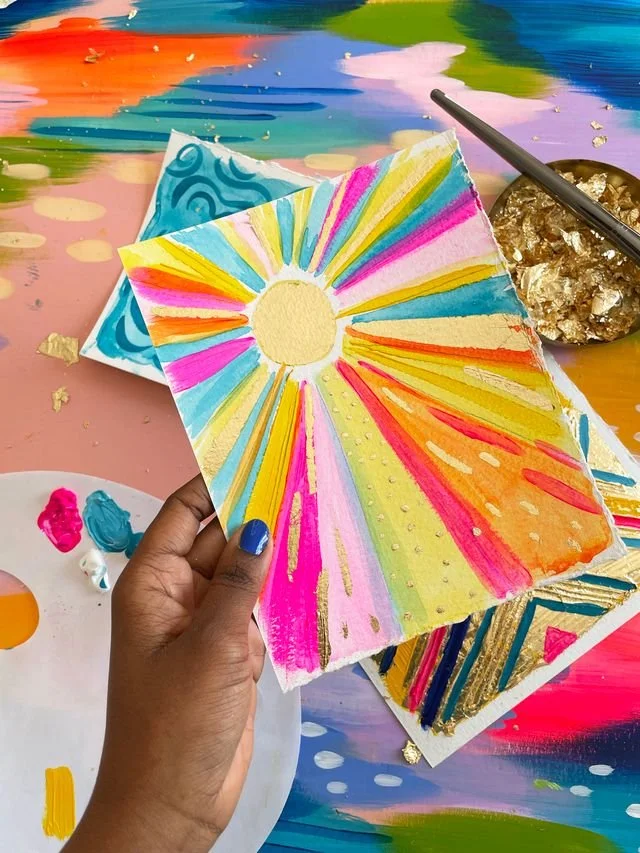
By the end of the tutorial, your painting will look something like this!

Supplies:
Note: Some of the links in this post are affiliate links. This means if you purchase something after clicking one of my links I may receive a small commission at no additional cost to you!
Acrylic paint
My favorite paint brand is Liquitex, but you can use anything you have on hand for this tutorial.
Here are the colors I’ll be using
Titanium White
Primary Yellow
Fluorescent Pink
Turquoise Blue
Paper or Canvas
I’ll be using a small piece of acrylic paper for this tutorial, but you can use whatever you like. Mixed media paper, canvas, watercolor paper – the options are endless!
Paint brushes
You don’t have to have any specific brushes for this tutorial. You’ll just want to make sure that you have a flat brush for the larger areas and a small round brush for the details. If you’re looking for a recommendation, I prefer the Simply Simmons brushes like this one.
Gold Art Supplies
We’ll be adding gold flourishes to this piece at the end. I used gold leaf in this example, but you can use gilding wax, gold acrylic paint or gold paint pens if you prefer. Here’s a link to a blog post with my favorite gold art supplies!
Now that you know what supplies you need, let’s dive in!
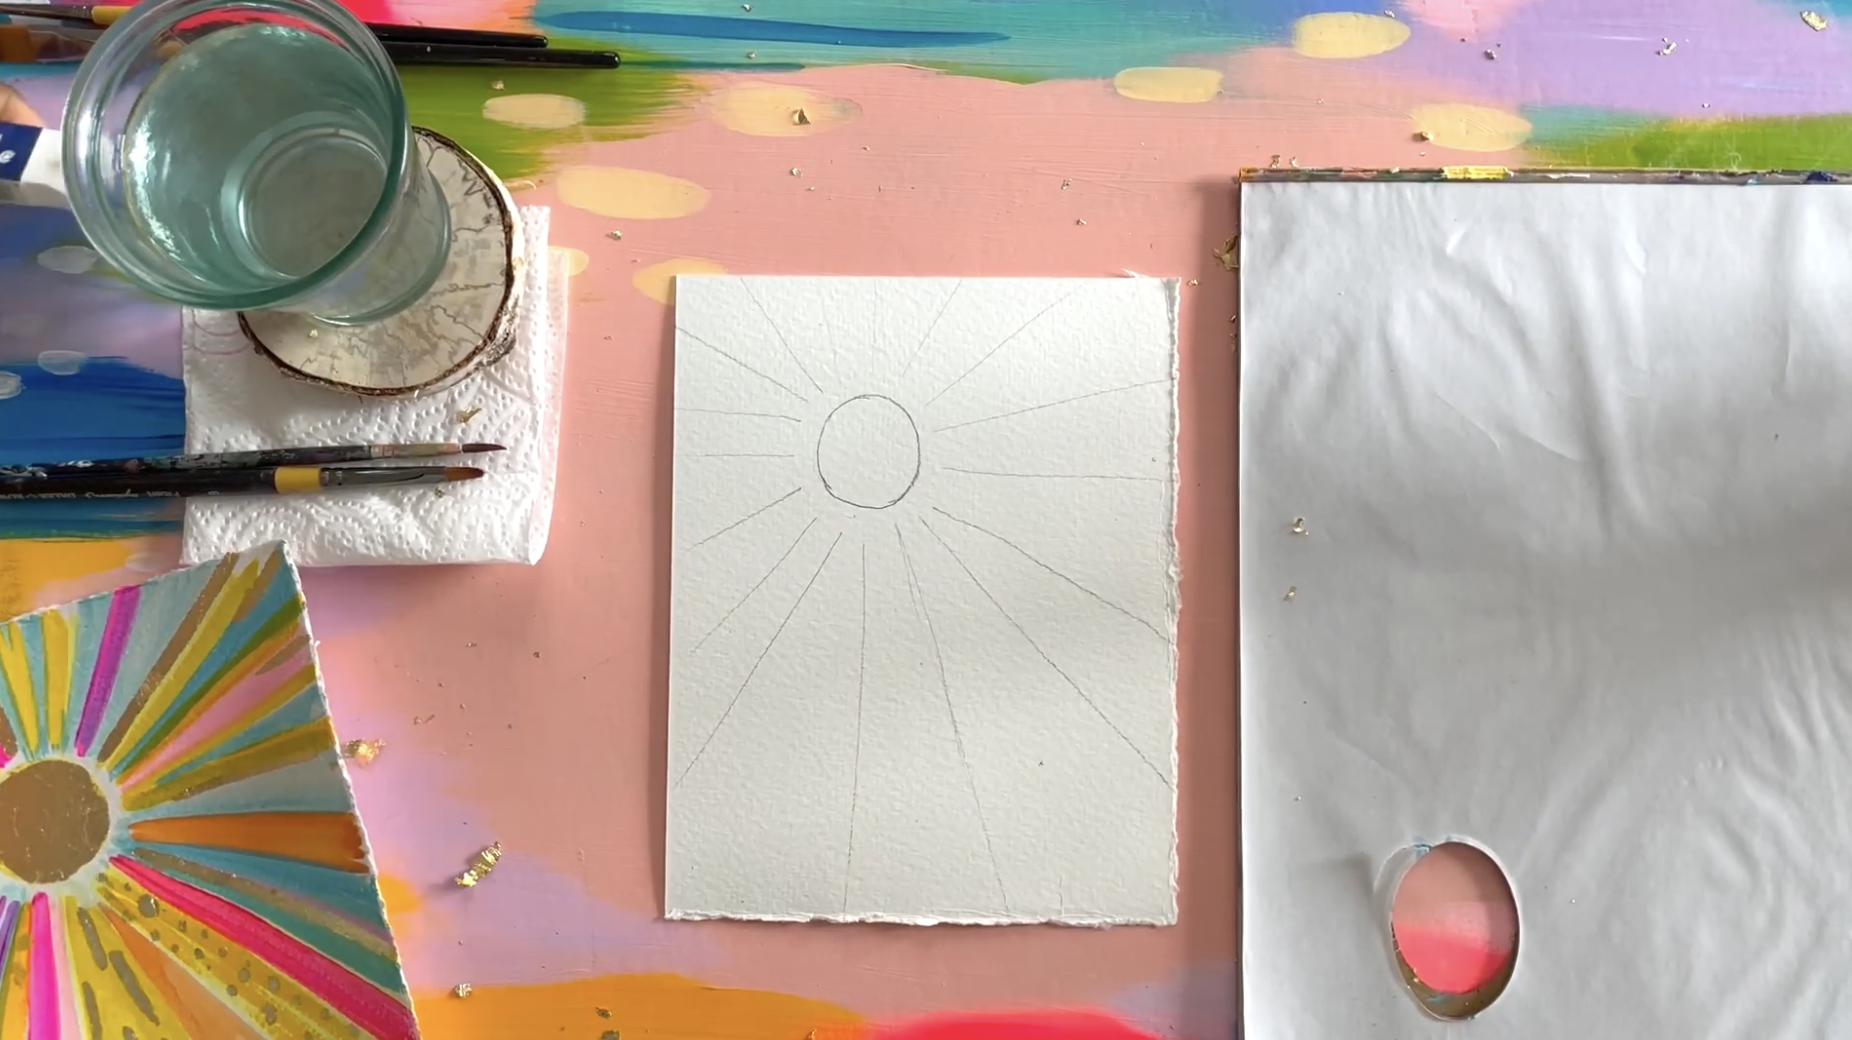
Sketch the sun
We’re going to start by sketching the sun. In my composition I wanted to keep the center of the sun in the top left quadrant of the page to give it more visual interest and allow more space for the shimmering rays to shine!
You can sketch the center of your sun on whatever part of the page you’d like!
Start by drawing a circle for the center. Then move on to the radiating rays. You don’t need to draw every ray you plan to paint, but you do want to give yourself a guide for painting the larger areas.
The rays should be smaller towards the center of the sun and get larger as you move toward the edge of the page. In my example, I wanted a little whitespace between the center of the sun and the rays, so I left that open as well.
Once you have your sketch completed, it should look something like this! (Note: I drew my sketch very dark because I wanted it to show up on camera, but you can draw yours lighter so that it is easier to cover up with the paint!)
Prep your colors
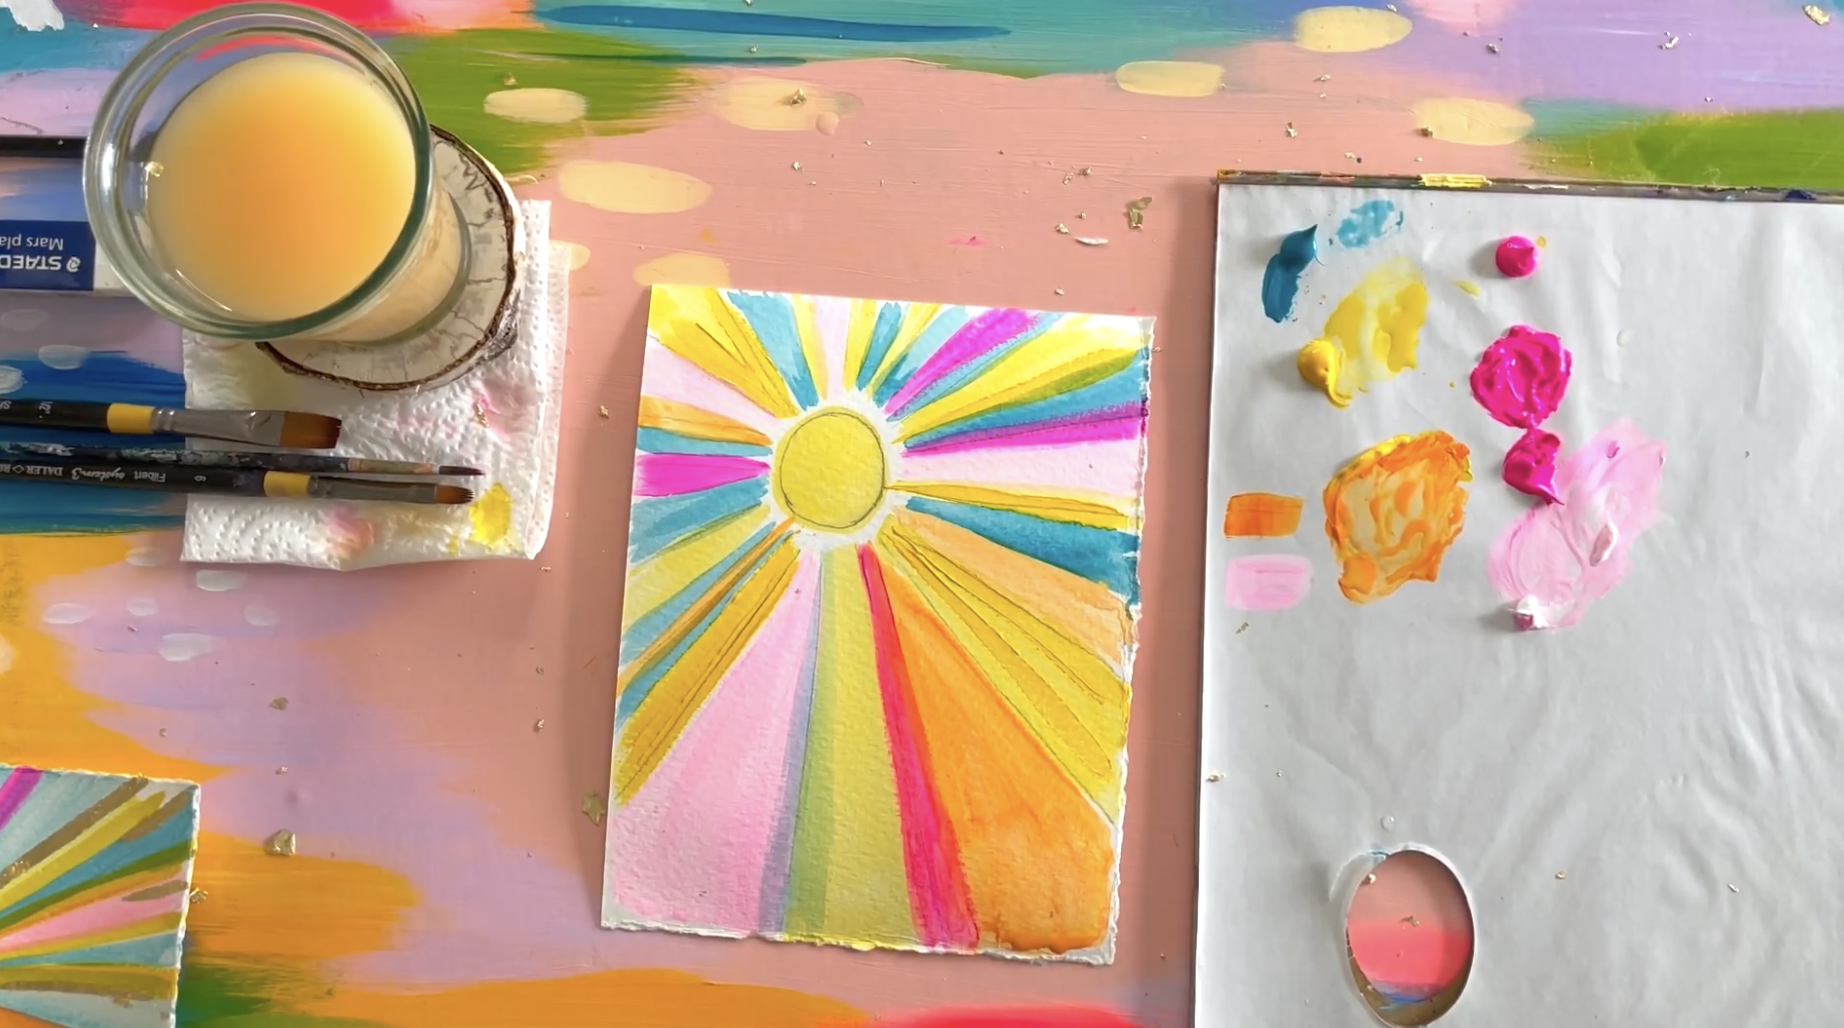
This sun uses a simple color palette of yellow, orange, pale pink, fluorescent pink, and turquoise.
The only two colors you’ll have to mix are orange (primary yellow + fluorescent pink) and pale pink (fluorescent pink + titanium white). Make sure to mix your colors little by little so that you can get the exact right shade you’re looking for!
Here is what my palette looked like for this project:
If you want more help with color mixing, check out this blog post about how to mix vibrant colors with acrylic paint.
Layer 1 - Yellow Wash
Now that you have your sketch, it’s time to start painting! The first layer is going to be a few rays painted in a light washy yellow.
You can create a wash effect with acrylic paint by adding water to the paint and thinning it out so that it’s almost like a watercolor consistency.
Now, start adding your yellow wash to various rays on your painting as well as the center of the sun. We don’t want to fill up the entire thing with yellow since we want to allow other colors to shine through later on. When your first layer is complete it should look something like this.

Wait for the paint to dry before moving onto your next layer. You can use a hair dryer to speed up the process if you’d like!
Layer 2 - Thick Yellow Paint
Once your initial layer is dry, go back to your palette and grab some of the yellow paint directly from the tube. Adding some thick acrylic brushstrokes is a nice contrast to the light, washy yellow.
This gives the painting a textured layer effect that instantly elevates it and gives it a more painterly feel.

Layer 3 - Orange Wash
Now it’s time to add a layer of orange to your sun rays. If you haven’t already, mix up some Primary Yellow paint with Fluorescent Pink to get a vibrant orange hue.
Thin this mix out a bit by adding water. Then proceed to add the orange to various rays on your painting just like we have been doing with the yellow!

Layer 4 - Pale Pink Wash
Next up, it’s time for some pale pink! Mix some Titanium White with a small amount of Fluorescent Pink, and add a tiny bit of water to the mix. Then paint a few rays with this gorgeous pale pink!
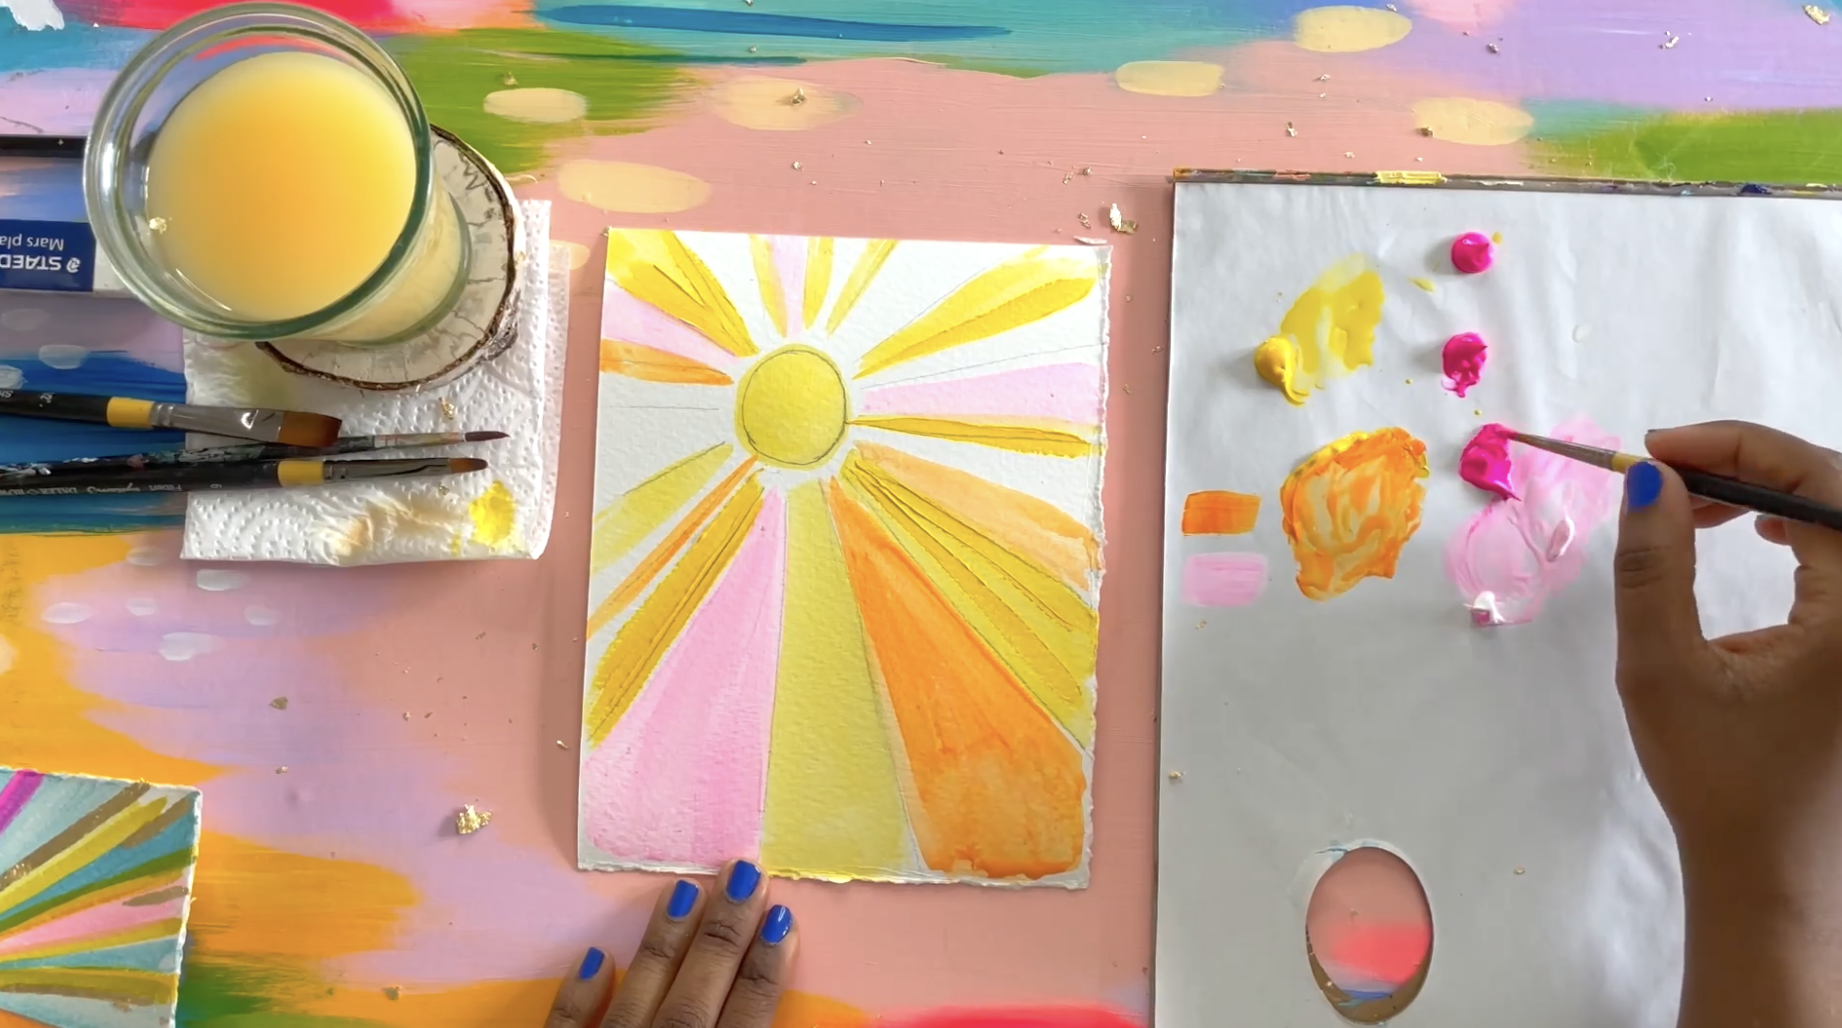
Layer 5 - Fluorescent Pink
The next layer will be all about the Fluorescent Pink. This vibrant color is one of my favorites to paint with. I use it in almost all of my artwork! It’s gorgeous straight out of the tube, so this layer should include more thick, textured brush strokes like we did with the yellow on layer two.

Layer 6 - Turquoise Wash
Time to add a pop of contrast! Last up, we will be adding some turquoise rays to our vibrant sun. This helps balance the composition and bring some contrast and grounding to an otherwise very bright piece!
Just like with our previous washes, we want to add some water to the turquoise paint to give it a light quality. This color is very strong when you paint with it directly out of the tube, so be sure to water it down enough that it doesn’t overpower the rest of the painting.
Add in your turquoise sparingly, and experiment with overlapping it with the various colors that you’ve already painted. When the turquoise overlaps with yellow, you’ll get little pops of green. When it overlaps with pink, you’ll find purple areas peeking out as the colors blend!

Layer 7 - Gold Accents
The final step is to add some gold accents to your painting. This is what will take it to the next level and create a sense of glimmering, shining, sun rays radiating from the center of the sun!
I used gold leaf for this example, but you can use paint, or gilding wax, or whatever metallic art supplies you have on hand.
I added my gold accents to the center of the sun, on various rays throughout the painting, and I also added smaller gold accents like dashes and dots.
The gold really brings the whole thing together and I love the end result! You can’t help but be happy when you look at the glittering rays of sunshine!

I hope you enjoy this project. If you try it, share your work on Instagram and tag me @ettavee so I can see your beautiful paintings!
xo, Jessi
If you want to use gold leaf for this project but haven’t used it before, I share more about the process in my class, Mesmerizing Metallics.
You’ll paint three stunning metallic projects with me and follow along with my process step-by-step. It’s an amazing way to improve your acrylic painting skills and learn how to use the tricky but rewarding medium of gold leaf!
You can take the class for free when you sign up for a free month-long trial to Skillshare using any of the class links in this blog post!

Pin this post for later! 📌
Hover or tap on this image and click the “Save” button on the top left!
